- Docs
- Your website
- Menus and site structure
Menus and site structure
Control the header, the menu links visitors click, and the footer that appears on every page of your website.
Updated September 11, 2026
On this page
What this is for
The header, the menu, and the footer appear on every page of your website, so they are edited in one place instead of page by page. This is where you decide what visitors can click, what your main button says, and what sits at the bottom of the site.
Where to find it
In the left sidebar, open Website, then Structure. You can also choose Edit this page on your website and open Header, Menu, or Footer in the editor. Clicking the header or footer on the canvas opens its controls. In that editor, use Publish website changes to apply your changes across all pages. Page drafts are saved separately.
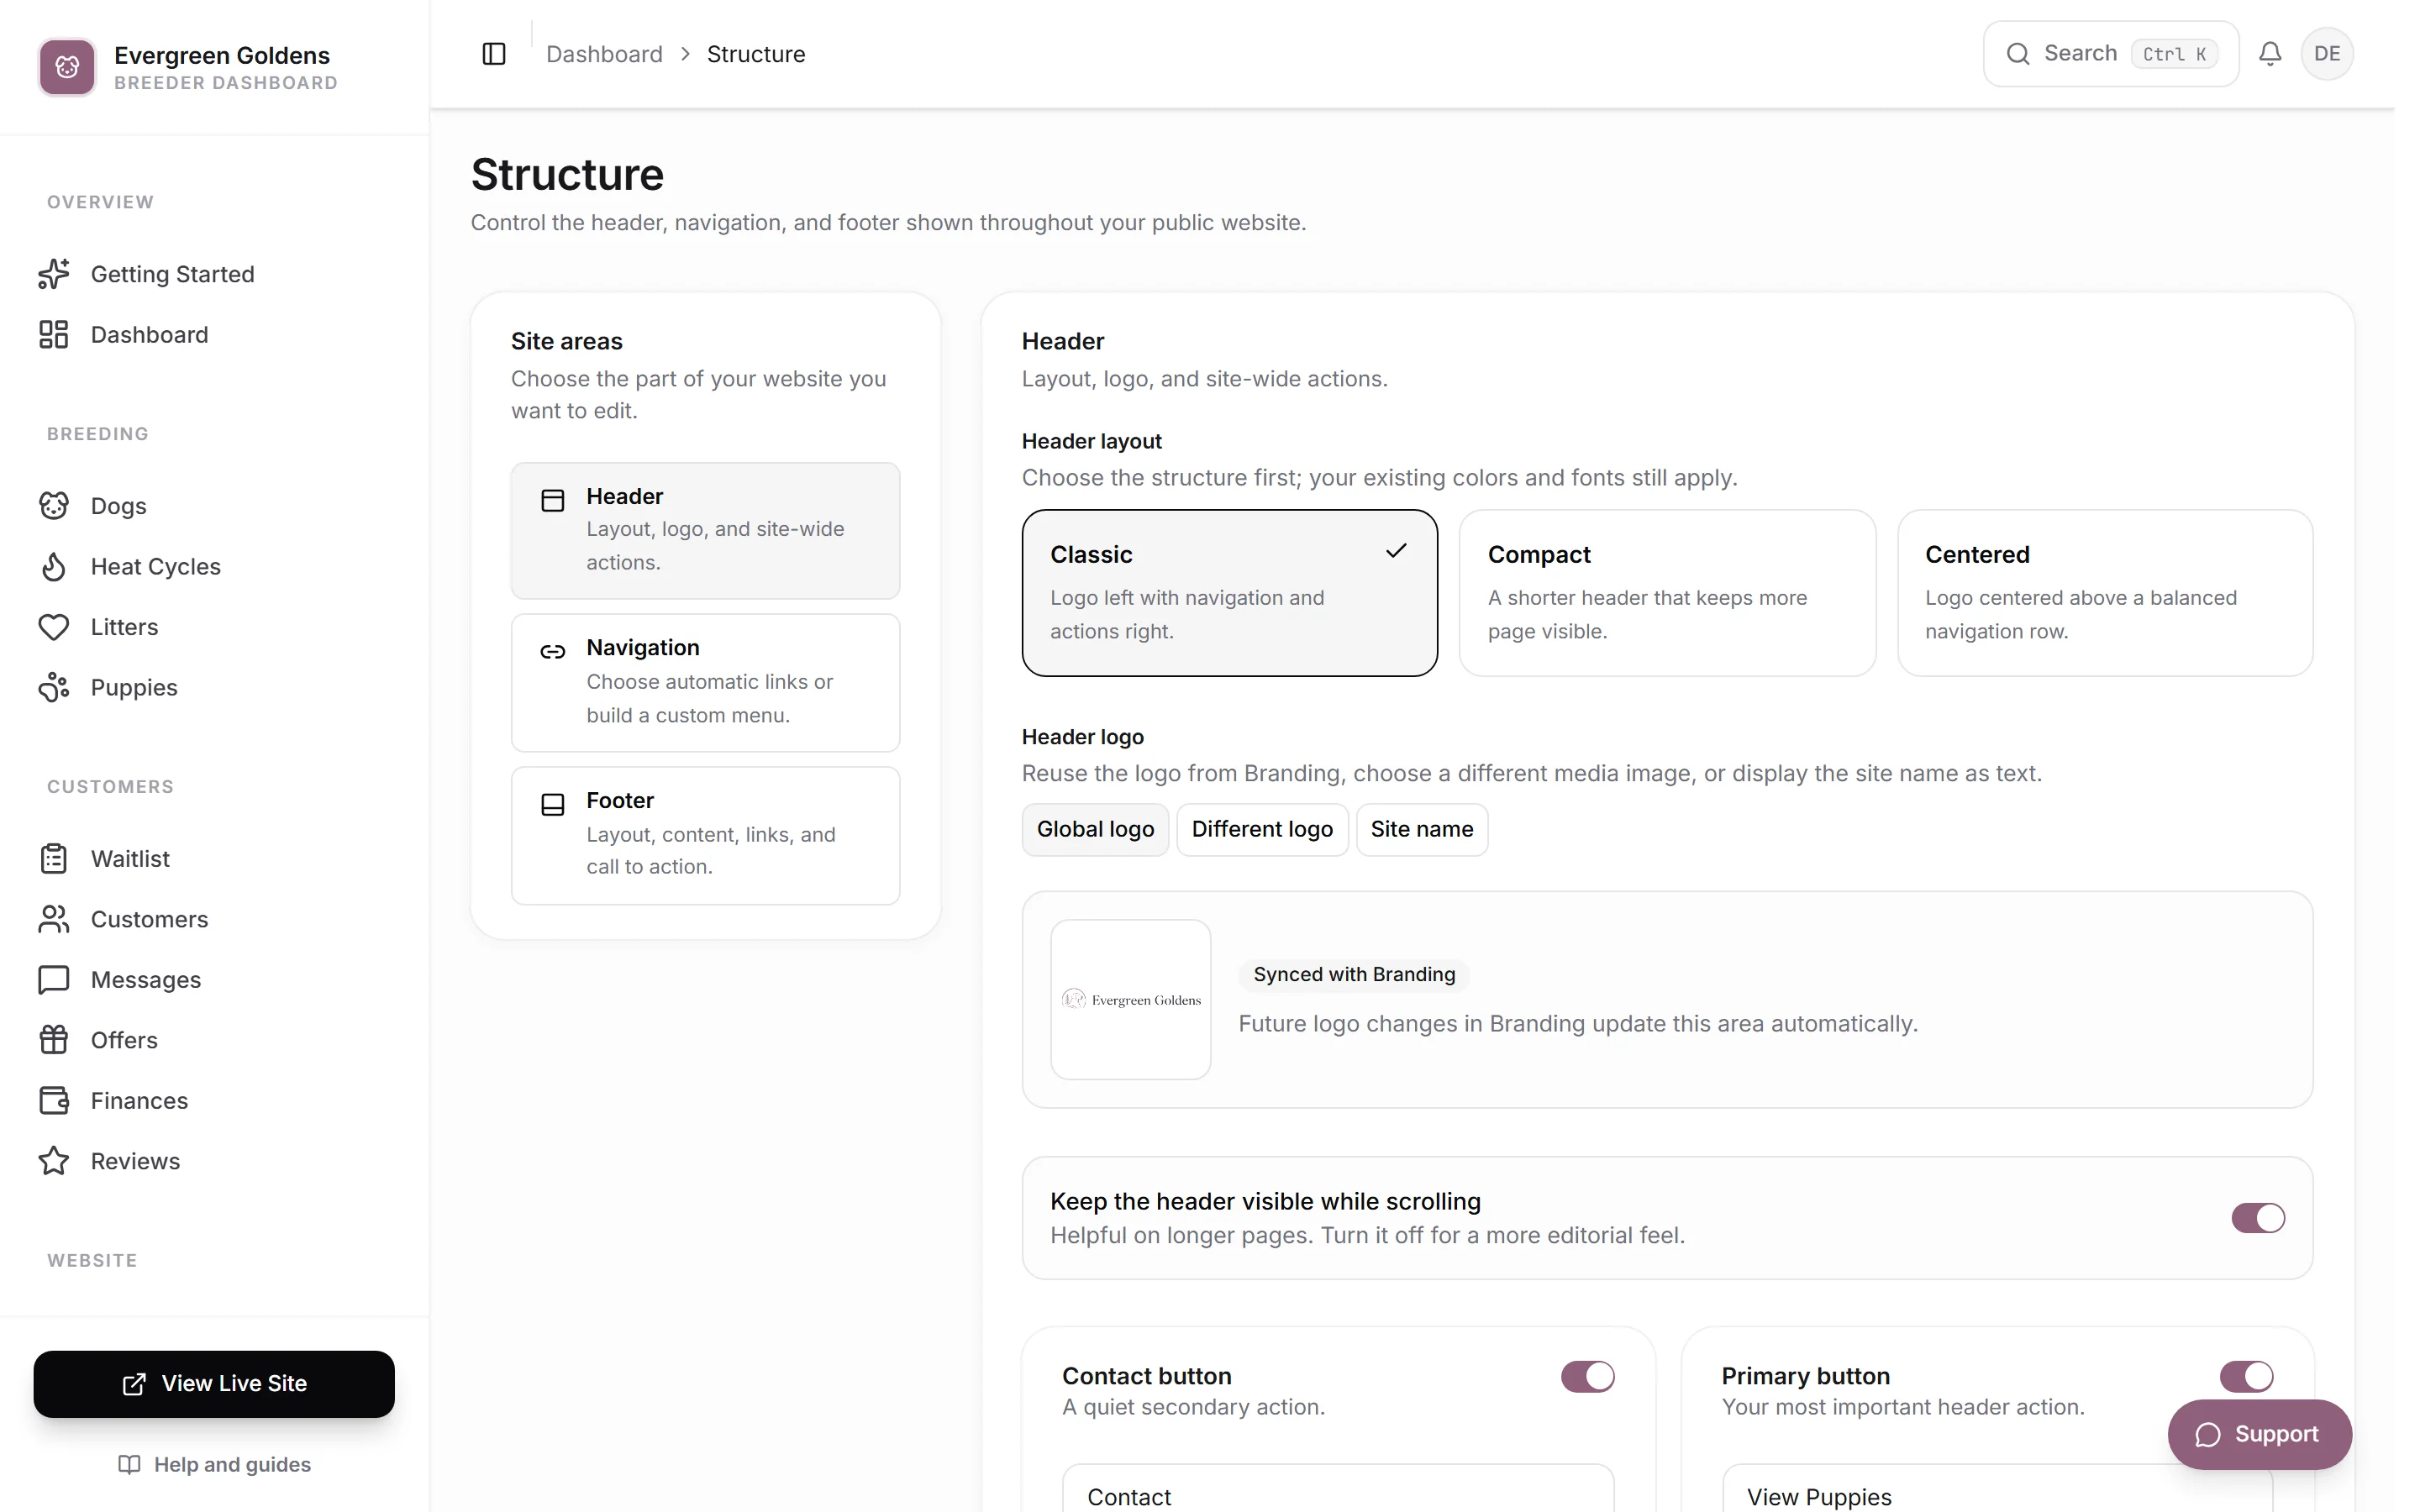
The Site areas card on the left has three choices: Header, Navigation, and Footer. Pick one, make your edits, then click Save changes at the bottom. Changes appear publicly only after you save. Discard puts back what you had.
The header
Open Header.
- Pick a Header layout: Classic, Compact, or Centered. Your colors and fonts still apply.
- Under Header logo, choose Global logo to use the logo from your branding settings, Different logo to upload one just for the header, or Site name to show text instead.
- Turn Keep the header visible while scrolling on or off.
- Use the Contact button and Primary button cards to show or hide those buttons and set the label and destination for each.
The Primary button is your most important action, usually the one that sends families to your application or waitlist. Destinations can be a path on your own site, like /puppies, or a full web address.
The menu
Open Navigation and choose how the menu is managed.
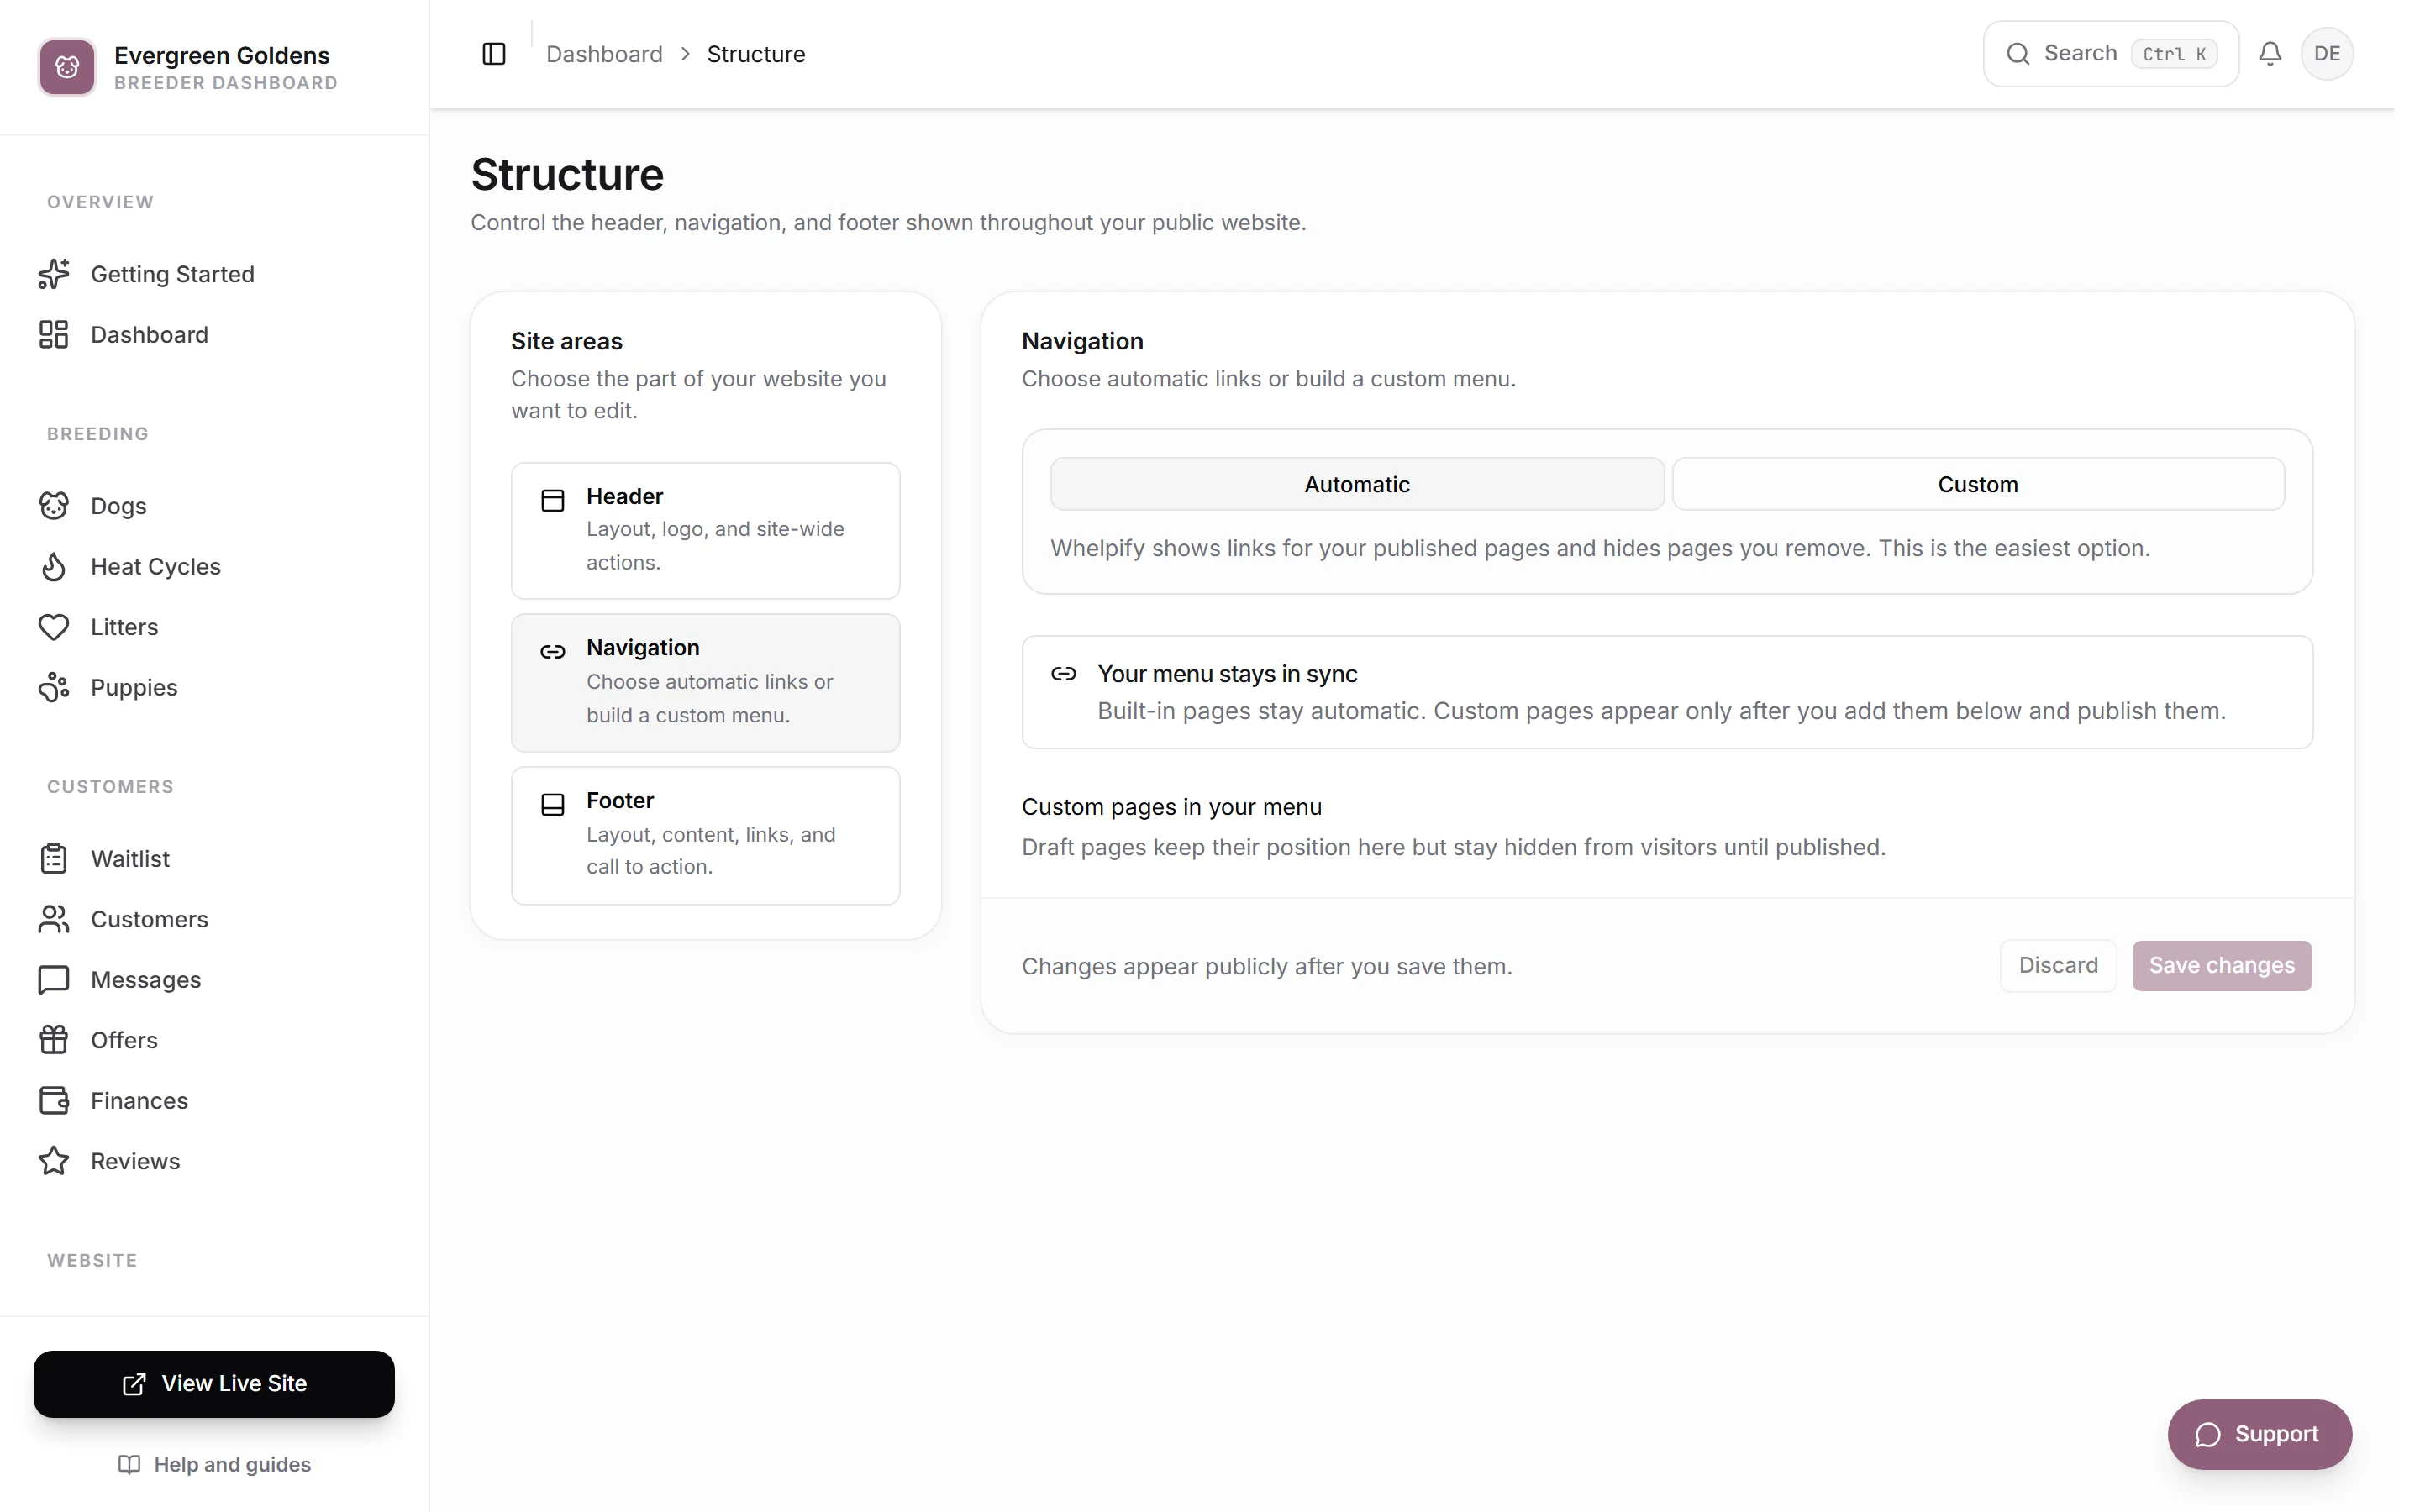
Automatic is the easiest option. Whelpify shows links for your published built-in pages and hides pages you take offline. Pages you created yourself do not appear automatically. Add them in the Custom pages in your menu area: pick the page under Add an existing page, choose a Menu location and Menu position, and set the Menu label and an optional short description. The link stays hidden until that page is published.
Custom lets you build the menu yourself.
- Click the button to add a menu item.
- Choose Direct link for a single link, or Dropdown for a group.
- Fill in the Label and the Destination.
- For a dropdown, add links inside it with their own label, destination, and short description.
- Use the up and down arrows to reorder, and the remove button to delete an item.
- Click Save changes.
The footer
Open Footer.
- Pick a Footer layout. Each one is a different arrangement of the same content.
- Set the Footer logo the same way as the header logo.
- Add a Short brand message, the line that appears beside your footer logo.
- Turn the content blocks on or off: Navigation links, Contact link, Social links, and Copyright line. Social links use the accounts saved in your site settings.
- Leave Custom copyright text (optional) blank to use your site name and the current year.
- If you want a closing call to action, turn it on and fill in the Small heading, Main heading, Description, and up to two buttons.
- Click Save changes.
Common questions
I published a new page and it is not in the menu.
If your menu is set to Automatic, pages you created yourself have to be added by hand. Open Navigation, find Custom pages in your menu, and add the page with the location and position you want. Built-in pages appear on their own once published.
Can I hide a page from the menu without deleting it?
Yes. Open the page in the page builder and click Take offline. The page and its menu link disappear from the site and the sitemap, and the content stays saved.
Where do the header colors and fonts come from?
From your branding settings. Structure controls layout and content only. See design, colors, fonts, and your logo.
What should the primary button point at?
Whatever you want families to do first, usually your application or waitlist page. Type the path exactly as it appears on your site, such as /apply or /waitlist.
Still stuck? Email info@whelpify.com and a real person will help.